What's in a Berkey?

So you just ordered or received your first Berkey Water Filter system. Congrats you're one huge step closer to better water!
Although the Berkey runs by gravity and requires no tools to set up, many are intimidated to set it up for the first time. But don't worry it is easy, just like riding a bike, as cliché as it might sound.
What is included in a Berkey system purchase?
No matter the size of the system, all Berkey Systems come with the same parts and pieces, with a slight variation on the Berkey Light, our BPA free plastic model, which is not pictured in this post.
Parts
The Knob
Includes (1) Washer and (1) Screw, installed inside the knob.
The Lid
Made from the same ASI Stainless Steel as the Berkey Chambers
The Upper Chamber
Easily distinguished by the filter holes on the bottom and its shape. Comes nested (upside down in bottom chamber).
Number of Filter holes equal the number of Black Berkey Filters the system can accept.
The Lower Chamber
Shown with the Berkey Ring installed. Easily distinguished by the solid bottom and spigot hole.
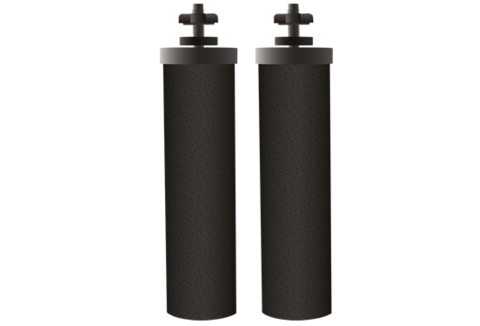
The Black Filters
Includes shown (2) Wing Nuts & (2) Washers. Every full size system comes with two Black Berkey Filters. All systems except the Travel can accept more filters, which are sold in sets of two.
Berkey Spigot
Includes (2) Washers and (1) Hex Nut, as shown. Can be upgraded to a Stainless Spigot or a Water View Spigot.
Anti Air Lock Clip
Clip on the edge of the bottom chamber to prevent Air Locks.
Base Ring
Prevents sliding. Comes attached to Lower Chamber as shown in Lower Chamber image above. 
Hole Plugs
Come with all systems, except the Travel, to fill unused Filter holes. Includes hole plug, (2) washers and (1) hex nut for each hole plug.
Fluoride Filters
Optional filter add-on. These connect onto the stems of the Black Filters and suspend in the lower chamber. If you choose to use, you need equal numbers of Black and Fluoride Filters. 
Faucet Priming Kit
Exclusive to berkeyfilters.com, this kit includes (1) blue silicone faucet priming attachment and (1) Fluoride Filter priming adaptor. This kit makes priming your filters fast and easy. How to Prime with Priming Kit
Priming Button
Included in the Black Filter Box. This thick tan washer is used for priming both types of Berkey Filters.
Red Dye
Included are two vials, one teaspoon each. Everything you need to run the initial Red Dye test!
Where to Start?
1. Wash Your Parts. Now that you are a Berkey part pro, the next step is to set aside the filters, and clean everything else with warm soapy water. Do NOT clean filters with soap.
2. Prime Your Filters. We have some great videos and instructions on our Black Filter priming page and our Fluoride Filter Priming Page, the video below shows how to prime both with your included Priming kit!
2. Prime Your Filters. We have some great videos and instructions on our Black Filter priming page and our Fluoride Filter Priming Page, the video below shows how to prime both with your included Priming kit!
3. Set Up You Berkey. After filters are primed, its time to install! - Leave Fluoride Filters off for the initial set up.
How to Set Up Your Berkey

4. Test Black Filters. After Installation we recommend testing your Black filters with the Red Dye Test, check out the video below.
🔴 Remember only test Black Filters.🔴
5. Run Water Through Your System. After your Black Filters pass the test, its time to install your fluoride filters and fill your system up! Make sure to discard the first 2 batches of water.
Helpful Tips
1. Filling the Berkey at least every 3 Days to keep Filters primed (wet)
2. Fill your system to the top of the filters to ensure even ware. However, make sure the bottom chamber has enough room for the water as it will leak from the seam if over filled.
3. If using Fluoride filters only install 6 rotations, as more could puncture the filter screen.
4. Make sure Filters, washers, and wing nuts are installed correctly (see pic). 
